

Key takeaways
- Automatic exposure: prevents headlights or bright sky from washing out the darker loading area.
- Low-light performance: infrared illumination helps in darkness, but it cannot recreate detail that is not reaching the sensor.
- Screen brightness: a monitor around 400–800 nits is easier to read in daylight than a dim budget display.
- Selectable mirror and normal views: useful because reversing cameras often need a horizontally mirrored image, while a rear-facing observation camera may not.
- Low latency: important when making small steering corrections near a post, gate, or hitch.
The best backup cameras for horse trailers are usually wireless Furrion Vision S or Haloview systems for easier installation, while wired Rear View Safety and Garmin setups are better when you want the most dependable signal and already have a route for cable.
Choosing the right camera is less about buying the widest lens and more about matching the system to your trailer length, towing frequency, lighting conditions, and tolerance for installation work. A horse trailer also needs a weather-resistant camera, a monitor that remains visible in sunlight, and enough viewing distance to show the hitch area without making nearby objects look impossibly small.
Our top picks


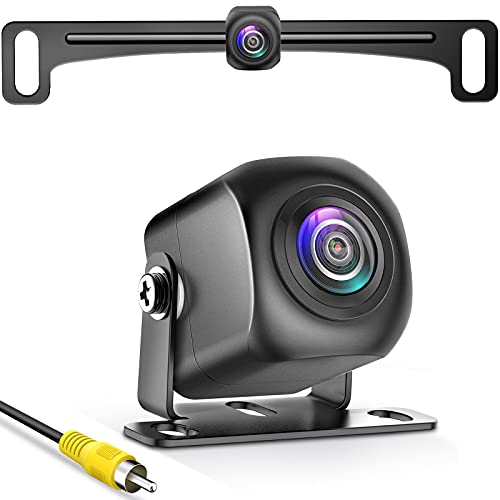

As an Amazon Associate we earn from qualifying purchases at no extra cost to you. Ratings are shown as listed on Amazon.
Best backup cameras by situation
| Situation | Best fit | Why | Typical market range |
|---|---|---|---|
| Occasional towing and minimal wiring | Furrion Vision S wireless system | Purpose-built trailer system with a dedicated monitor and relatively simple camera power connection | $250–$550 |
| Long trailer or frequent reversing | Haloview multi-camera system | Expandable layouts can cover the rear, sides, and interior without relying on one ultra-wide view | $300–$800 |
| Maximum signal stability | Rear View Safety wired system | Hard-wired video generally avoids wireless interference and pairing problems | $180–$600 |
| Truck already equipped for Garmin accessories | Garmin BC 50 with a compatible Garmin navigator | Compact camera and navigation-screen integration can reduce dashboard clutter | $150–$300, excluding a compatible display |
| Lowest-cost basic installation | Generic 12-volt wired camera and 5–7-inch monitor | Simple architecture and widely available replacement parts | $80–$220 |
Furrion Vision S: the easiest trailer-oriented choice
Furrion Vision S systems are designed around recreational vehicles and trailers, making them a sensible starting point when you want a complete camera-and-monitor package rather than a collection of vehicle electronics. Common configurations use a dedicated monitor in sizes around 4.3 to 7 inches, with larger kits supporting additional cameras.
The major advantage is installation simplicity. The camera still needs a suitable 12-volt power connection, but video does not require a long cable running from the rear of the trailer to the cab. That can save several hours and avoids drilling through interior panels or routing cable near horse compartments.
Wireless does not mean battery-powered or completely cable-free. The camera normally draws power from the trailer’s running-light or marker-light circuit. If the camera image drops out, check the trailer plug, ground connection, running-light fuse, and the antenna position before assuming the camera has failed.
Vision S is a strong choice for reversing into a paddock, checking traffic behind a trailer, and monitoring a long straight approach. It is less ideal if the tow vehicle and trailer create a difficult radio path or if you need a very low-latency image for precise hitch alignment.
Haloview: best for coverage and multi-camera flexibility
Haloview systems are appealing when one rear camera cannot show everything you need. A rear camera can cover the road and loading area, while side cameras help reveal vehicles in adjacent lanes or obstacles near the trailer’s front corners. Some packages also support an interior camera, although placement inside a horse compartment should not compromise ventilation, partitions, or animal safety.
The practical benefit is coverage rather than simply a larger image. A single 170-degree camera may show more horizontally, but wide-angle lenses stretch the edges and reduce useful detail at distance. Two cameras with narrower fields of view can provide more informative images than one extreme wide-angle unit.
Check the exact kit before buying. Camera count, monitor size, recording capability, microphone functions, and extension-cable support vary by package. For a gooseneck or trailer longer than about 25 feet, confirm that the manufacturer’s stated wireless range applies to a vehicle-and-trailer installation, not only to an unobstructed open-air test.
Rear View Safety: choose wired reliability
Rear View Safety offers wired and multi-camera vehicle systems, including setups commonly used on trucks, vans, and trailers. A wired connection is usually the better technical choice where uninterrupted video matters more than installation speed. It is also useful on large metal trailers, which can weaken or reflect wireless signals.
The trade-off is labor. A typical installation requires routing a video cable along the trailer frame, protecting it inside split loom, securing it at regular intervals, and leaving enough slack at the hitch for turning. Any cable near the coupler should be protected from crushing and abrasion. Use weather-sealed connectors rather than leaving joins exposed to spray and road salt.
A wired system is not automatically better in every respect. A poorly routed cable can fail from vibration, and a camera mounted without a drip loop can still suffer water ingress. The installation quality is part of the product.
Garmin BC 50: convenient when the screen is already in the cab
The Garmin BC 50 is a compact wireless backup camera intended to work with compatible Garmin navigation devices. Its appeal is the use of an existing Garmin display instead of adding a separate monitor to the dashboard. This can make the cab less crowded and keeps the camera view near navigation information.
It is best suited to owners who already have a compatible Garmin navigator and a relatively straightforward mounting location. Before purchase, confirm device compatibility and the required power arrangement. A camera designed for a car can be less convenient on a long horse trailer if the wireless link must pass through a large body, a truck cab, and the trailer’s metal structure.
Image quality: resolution is only one part of the decision
For reversing, a clean 720p image is often more useful than a nominally higher-resolution image with glare, compression, or poor exposure. Look for these characteristics:
- Automatic exposure: prevents headlights or bright sky from washing out the darker loading area.
- Low-light performance: infrared illumination helps in darkness, but it cannot recreate detail that is not reaching the sensor.
- Screen brightness: a monitor around 400–800 nits is easier to read in daylight than a dim budget display.
- Selectable mirror and normal views: useful because reversing cameras often need a horizontally mirrored image, while a rear-facing observation camera may not.
- Low latency: important when making small steering corrections near a post, gate, or hitch.
Night vision should be treated as an aid, not a replacement for checking the area on foot. Infrared LEDs can reflect from dust, rain, or a dirty lens and create a bright haze. If your trailer has bright rear lamps, test whether they flare across the camera image.
Viewing angle and mounting height
A horizontal viewing angle of roughly 120–150 degrees is a useful general range for a trailer rear camera. Angles above that can help reveal corners but may make vehicles and obstacles look farther away than they are. For precise hitching, a second lower camera or a camera with a downward adjustment is often more useful than an exceptionally wide lens.
Mount the camera high enough to reduce damage from kicked-up grit, but not so high that the rear bumper and hitch disappear. A small downward tilt should show the area immediately behind the trailer while retaining a useful view down the road. After installation, place cones at 3, 10, and 20 feet behind the trailer and verify what is visible from the driver’s seat.
Installation difficulty: wireless is simpler, not effortless
Basic setup sequence
- Choose a mounting point with a clear view and a solid, corrosion-free ground.
- Connect the camera to a fused 12-volt source, commonly the running-light circuit.
- Route any cable through a rubber grommet and create a downward drip loop before the connector.
- Pair the monitor or connect the video cable, then check the image with the engine running and the trailer lights switched on.
- Turn the steering fully in both directions and inspect the cable or wireless antenna area for strain or obstruction.
- Secure wiring with UV-resistant ties or loom, keeping it away from sharp edges, hot exhaust components, suspension movement, and horse-contact areas.
Plan on about one to three hours for a straightforward wireless installation, and roughly three to six hours for a careful wired installation. The range depends on access to panels, the trailer frame, and whether a professional must add a protected power circuit.
Weather resistance and ownership costs
Look for an outdoor camera rated at least IP65; IP67 gives more confidence against temporary water exposure. The rating does not make a connector indestructible. Road salt, manure dust, pressure-washing, and repeated temperature changes usually attack connectors and cable seals before the camera electronics fail.
Clean the lens with water and a soft microfiber cloth. Do not use abrasive paper towels or spray a pressure washer directly at the camera seal. Inspect the mount twice a year, especially if the trailer travels on unpaved roads. A loose bracket causes a shaky image that can be mistaken for poor camera quality.
Replacement expenses commonly include a monitor, extension cable, camera, mounting hardware, or a damaged trailer-side connector. Keeping a spare fused power lead and a short replacement cable can prevent a minor electrical fault from becoming a canceled trip.
Final buying recommendation
Choose Furrion Vision S for a convenient, trailer-focused system with modest wiring. Choose Haloview when side or interior coverage matters. Choose a wired Rear View Safety system when dependable signal quality outweighs installation effort. Choose the Garmin BC 50 when you already own a compatible Garmin display and want a compact dashboard arrangement.
Whatever system you select, prioritize a bright monitor, a weather-resistant camera, a realistic viewing angle, and protected wiring. A properly mounted 720p camera with a stable connection is safer and more useful than a high-resolution camera that loses its signal or shows a distorted, glare-filled view.

Write Your Review
No reviews yet. Be the first to share your experience!