

Key takeaways
- To set up a stall for a new horse, start with a safety sweep of every surface, add clean deep bedding over firm, level flooring.
To set up a stall for a new horse, start with a safety sweep of every surface, add clean deep bedding over firm, level flooring, then put in fresh water, a feeding setup and good airflow before the horse ever steps off the trailer. Plan to finish the physical work a few days ahead so you can spend arrival day watching the horse rather than hammering boards.
A new stall is more than four walls and shavings. The horse is arriving after a stressful trip, in a new place, with new neighbors, new smells and a new routine. A calm, safe stall helps him settle, and it also saves you from the injuries that happen when a bolt sticks out, a bucket hangs too low or the ventilation is poor. Here is a practical order of work for 2026 and beyond.
Start With the Space Itself
Walk the stall slowly, looking at it the way a nervous horse might. Run a hand along every board, post and corner. Anything sharp, splintered or loose needs fixing or covering. Look at head height, shoulder height and knee height, because horses rub, lean and paw at all three.
Size matters too. Many barns use a stall around 12 by 12 feet for an average-sized horse, and larger breeds or foaling mares need more room. If your stall is smaller, plan for extra turnout and exercise time. Ask your barn manager or an experienced trainer what is typical for your area.
Build the Stall Interior Step by Step
Flooring and bedding
Flooring should be level, drain well and give secure footing. Many owners put down stall mats over compacted base material, then add a deep layer of bedding such as shavings or straw. The mats cushion joints and cut down on bedding use. Fill the bedding deep enough that the horse can lie down and get up comfortably, and bank it up slightly along the walls to help prevent a horse from becoming cast.
Water and feed
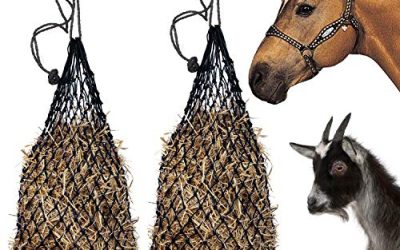
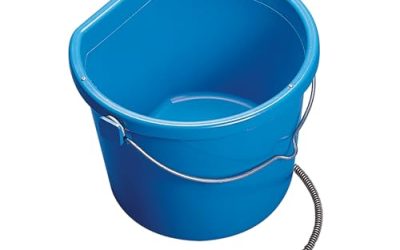
Fresh water has to be available at all times. Hang buckets or install an automatic waterer at a height that the horse can reach without strain and where nothing can trap a leg. Secure feed tubs or hay racks at the right height and keep them away from corners where a horse can get trapped. If you use a slow feeder, introduce it gradually and keep hay available according to your vet’s guidance.
Walls, doors and hardware
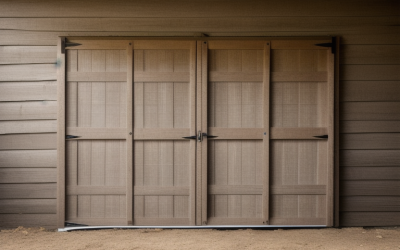
Check that latches are horse-proof and easy for you to open quickly in an emergency. Hooks, nails and screws must be recessed or removed. Door tracks and hinges should move smoothly with no sharp edges. If your stall has windows, use guards or bars so a horse cannot put his head or leg through glass.
Light and airflow
Good ventilation matters more than warmth. Stale, ammonia-heavy air can irritate the respiratory system, so make sure air can move through the stall without creating a cold draft at head height. Natural light helps, and safe lighting inside the barn makes late-night checks easier.
A Stall Setup Checklist at a Glance
| Area | What to check | Why it matters |
|---|---|---|
| Walls and boards | No splinters, protruding nails or loose panels | Prevents cuts and caught limbs |
| Floor | Level, firm, drains well | Secure footing and healthy hooves |
| Bedding | Deep, clean, banked along walls | Comfort and help avoiding a cast horse |
| Water | Always available, safely mounted | Hydration and digestive health |
| Feeding setup | Secure tub or rack at a safe height | Reduces waste and entanglement |
| Latches and doors | Horse-proof and quick for you to open | Escape prevention and emergency access |
| Ventilation | Air moving without a cold draft | Respiratory comfort |
| Lighting | Safe fixtures with covers | Visibility and fire safety |
Before You Start: Quick Checklist
- Confirm the stall size works for your horse’s height and temperament.
- Remove or recess every nail, screw and sharp edge.
- Clean out old bedding, cobwebs and dust.
- Test latches and door tracks for smooth, safe operation.
- Put in a deep layer of fresh bedding.
- Fill water and set up hay and feed containers.
- Locate your vet’s number and a first-aid kit near the barn door.
The First Days After Arrival
Give the horse time to look around before asking anything of him. Offer water and hay right away, and watch how he eats and drinks. A horse that refuses food or shows signs of discomfort needs a call to the vet. Keep the routine simple: the same feeding times, the same turnout schedule and as few changes as possible.
If you have other horses, introduce them over a fence or through a stall guard before putting them in shared pasture. Neighbors that squabble over a wall can damage boards and each other, so choose the new horse’s stall location with care.
Mistakes to Avoid
- Using shallow bedding that leaves the floor hard or wet.
- Hanging buckets so low that a hoof can catch.
- Closing up a stall to keep it warm without airflow.
- Leaving tools, rakes or buckets in the stall during turnout changes.
- Skipping the final inspection after cleaning.
Safety Checks Many People Miss
Most stall injuries come from small details rather than big structural failures. Look up as well as down: cobwebs and dust on the rafters are a fire risk, and loose wiring or exposed bulbs should be fixed or covered before a horse moves in. Check the ceiling height too, since a horse that rears or throws his head up can hit a low beam.
Look at the gaps. A gap between boards or beneath a door that is large enough for a hoof to slip into can trap a leg when a horse paws or rolls. Fill or cover those spaces. Check that the stall front and door are strong enough to resist a leaning horse, and that any feed opening is the right size so a head cannot get stuck.
Finally, think about the stall’s neighbors and the aisle. A stall next to a busy wash rack, a noisy tack room or a horse that is aggressive over the wall can keep a new arrival anxious. If you have a choice, put the newcomer in a calmer spot near a friendly neighbor and within sight of other horses, because many horses settle faster when they can see company.
Setting Up a Daily Routine
Horses thrive on routine, and a clear plan for the stall makes the first weeks easier. Decide in advance who will feed, who will muck out and when. Write the schedule on a whiteboard or a simple sign by the door, along with the horse’s feeding amounts and any supplements, so anyone covering for you knows what to do.
Pick a set time to pick out manure and wet spots, and a day each week for a deeper clean. Dry, clean bedding helps keep hooves healthy and reduces ammonia. Check water buckets twice a day, scrub them regularly and watch for changes in how much your horse drinks, since a sudden shift can be an early sign that something is wrong.
Keep a small kit within reach of the stall: a halter and lead rope, a flashlight, a basic first-aid kit and a card with your vet’s phone number. If your horse seems off, is not eating or shows any signs of colic or lameness, call your vet promptly rather than waiting.
Related guides
- Solar Electric Fence Chargers For Horse Pastures
- Saddle Pads For Horses With High Withers
- Fly Masks For Horses With Sensitive Eyes
Frequently Asked Questions
How deep should the bedding be?
Deep enough that the horse can lie down comfortably and the floor is never exposed. Your barn manager can give a depth that fits your bedding type.
Do I need stall mats?
They are common because they add cushion and cut down on bedding use. They are not required, but a firm, even, well-draining floor is.
Should the horse be kept in all day at first?
Most horses do better with regular turnout, if your barn allows it. Ask your vet or trainer how to introduce the new horse to pasture gradually.
How often should I check the stall?
Look it over at every feeding and every cleaning. Small problems like a loose board or a damp spot are easiest to fix early.
More from Amazon
Programs that pair well with the guide above. Offers and eligibility are set by Amazon and may change.
Set up recurring deliveries of everyday items on eligible products. Terms and savings are set by Amazon.
Explore Subscribe & SaveFree shipping on eligible items, Prime Video and more. Eligible new members can start with a free trial.
Start a Prime free trialAudiobooks and podcasts to listen to on the go. Eligible new members can start with a free trial.
Try Audible freeRead from a large library of eBooks and audiobooks on any device. Check Amazon for current plans.
Explore Kindle UnlimitedAs an Amazon Associate we earn from qualifying purchases.


Write Your Review
No reviews yet. Be the first to share your experience!