

Key takeaways
- Best Stroopwafel Maker for Dutch Waffles The best stroopwafel maker for Dutch waffles is a dedicated electric iron with shallow circular plates, adjustable heat, and enough hinge control to press dough into a thin, even wafer without crushing the caramel…
Best Stroopwafel Maker for Dutch Waffles
The best stroopwafel maker for Dutch waffles is a dedicated electric iron with shallow circular plates, adjustable heat, and enough hinge control to press dough into a thin, even wafer without crushing the caramel filling. For most home bakers, a dedicated electric stroopwafel maker is a better choice than a standard Belgian waffle maker; its plates are designed for thin Dutch waffles rather than thick, deep-pocketed waffles.
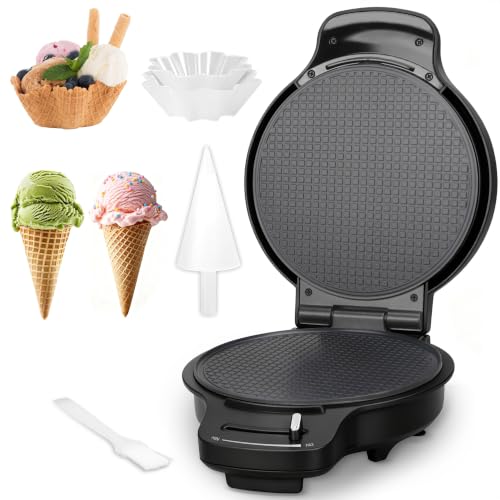
A dedicated model such as the CucinaPro Electric Stroopwafel Maker is the strongest fit for regular home use because it combines compact storage with shallow patterned plates. However, the right choice depends on how often you bake, how much counter space you have, and whether you need one large waffle or several small rounds at a time.
Our top picks


As an Amazon Associate we earn from qualifying purchases at no extra cost to you. Ratings are shown as listed on Amazon.
Quick comparison: which type makes the best Dutch waffle?
| Maker type | Typical waffle size | Typical temperature range | Plate pattern | Best for | Main limitation |
|---|---|---|---|---|---|
| Dedicated electric stroopwafel maker | 4–5 inches | 300–425°F | Shallow grid, usually 2 plates | Thin, filled Dutch waffles | Usually makes one or two at a time |
| Commercial-style electric stroopwafel iron | 8–10 inches | 350–450°F | Large shallow grid | Frequent baking and larger batches | Heavy, expensive, and needs more storage space |
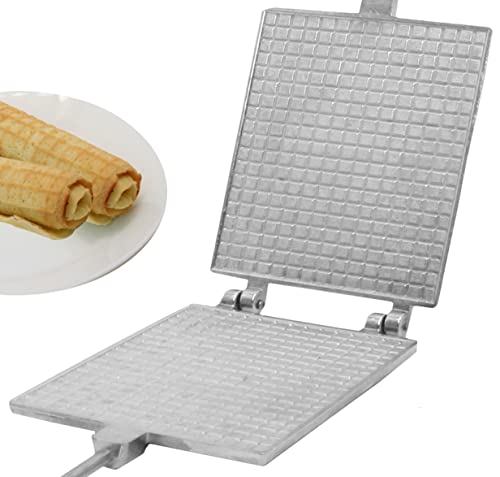
| Stovetop cast-iron wafer iron | 4–6 inches | Depends on the burner | Varies from fine grid to decorative pattern | Experienced bakers and occasional use | Heat is harder to reproduce from batch to batch |
| Pizzelle maker | 4–5 inches | Usually fixed or lightly adjustable | Very thin, often floral or geometric | Thin wafers when a stroopwafel iron is unavailable | Pattern and diameter may not match Dutch waffles |
| Belgian waffle maker | 6–8 inches | 350–450°F | Deep pockets | Belgian-style breakfast waffles | Too thick for a traditional stroopwafel |
Best overall: a dedicated electric stroopwafel maker
A dedicated electric maker is the best all-around option for people who want consistent Dutch waffles without managing a burner. Look for plates around 4 to 5 inches across with a shallow grid. This size is large enough for a useful layer of syrup filling but small enough for the dough to cook evenly before the edges become brittle.
The CucinaPro Electric Stroopwafel Maker is a practical example of this category. Its purpose-built shallow plates are more suitable than the deep plates on a Belgian waffle appliance, and its compact format is easier to store than a commercial iron. It is a good match for occasional weekend baking, small households, and anyone learning to roll and fill stroopwafels.
The compromise is production speed. A small home iron generally cooks one or two wafers per cycle. If each cycle takes about 2 minutes, including loading and opening, a realistic output is 25 to 40 wafers per hour rather than the much higher numbers suggested by the heating time alone.
What matters most when comparing stroopwafel makers
1. Plate pattern and depth
The plate should create a fine, shallow grid rather than deep wells. Deep pockets produce a thicker cookie, trap more dough, and make it harder to slice each wafer into two even halves for filling. A pattern depth of roughly 1 to 2 millimeters is more useful for classic thin stroopwafels than a 5 to 10 millimeter Belgian pattern.
Check whether the upper plate presses flat against the dough. Excessive movement in the hinge can create a wafer that is thick on one side and paper-thin on the other. A locking latch is helpful, but it should not require force that compresses the dough excessively.
2. Temperature control
Adjustable heat is more valuable than a decorative indicator light. Dough containing butter and sugar can brown quickly, while a cooler setting may leave the center flexible enough to cut cleanly. A useful working range is approximately 300–425°F, although the dial markings on small appliances are often approximate.
Start around 350–375°F and adjust after the first two wafers. If the cookie is dark before the center sets, lower the heat. If it stays pale and bends rather than releasing cleanly, increase the heat slightly or extend the cooking time. A maker that cycles on and off normally may have a surface temperature that fluctuates by 25–50°F, so visual results matter more than the printed dial.
3. Waffle diameter
A 4-inch wafer is easy to handle and suits a modest amount of caramel. A 5-inch wafer feels closer to the generous café-style format but requires more dough, more filling, and a larger storage container. For family baking, two small wafers per cycle can be faster than one large wafer, provided both plates heat evenly.
Measure the actual plate diameter, not the outside width of the appliance. A compact appliance may occupy 9 by 12 inches on the counter while producing wafers no larger than 4 inches.
4. Cleanup
Nonstick plates simplify cleanup, but they are not a substitute for careful portioning. Caramel forced onto a hot plate can harden around the hinge and edge seam. Choose an appliance with a smooth exterior, minimal exposed screws, and a hinge that can be wiped without disassembly.
Do not immerse an electric maker unless the manufacturer specifically allows it. Unplug it, let it cool until the sugar is firm but not rock-hard, then lift residue with a wooden or silicone tool. A soft damp cloth usually removes the remaining film. Abrasive pads and metal utensils can damage the coating, causing dough to stick and making later cleaning more difficult.
5. Build quality
The parts most likely to wear first are the nonstick coating, hinge, latch, and power cord near the appliance body. A heavier lid and a firm hinge generally help the plates stay parallel, but extra weight also makes storage less convenient. For frequent use, prioritize thick metal plates, a stable base, a well-supported hinge, and a cord that exits away from the hottest surface.
Plastic housing is acceptable for occasional baking if the lid remains rigid when pressed. Avoid a maker whose upper plate flexes visibly or whose handle transfers heat after several cycles.
Decision matrix by baking situation
| Your situation | Best choice | Why | What to avoid |
|---|---|---|---|
| First-time baker with limited counter space | Compact dedicated electric maker | Simple heat control and shallow plates reduce the learning curve | Large commercial iron |
| Occasional baking on a tight budget | Stovetop wafer iron or basic pizzelle maker | Lower upfront cost if you already own suitable cookware | Appliances with no replacement or cleaning access |
| Monthly or weekly family batches | Electric maker with two 4–5-inch plates | Good balance of speed, storage, and consistency | One-wafer models with slow heat recovery |
| Frequent events or small-scale selling | Heavy commercial-style iron | Better heat recovery and more durable hinges | Lightweight household units |
| Strictly traditional appearance | Dedicated shallow-grid stroopwafel maker | Closer diameter and pattern to Dutch waffles | Deep Belgian waffle plates |
How to get consistently thin Dutch waffles
- Preheat fully. Give the maker at least 5 minutes, or wait until its indicator shows ready. A partly heated plate can leave the first wafer thick and pale.
- Portion the dough by weight. For a 4-inch wafer, begin with approximately 12–16 grams of dough. For a 5-inch wafer, try 18–24 grams. Adjust based on plate coverage rather than relying on a heaped teaspoon.
- Place dough slightly off-center if needed. Closing the lid should push it toward the edges without forcing dough into the hinge.
- Cook until flexible but set. Remove the wafer when it is evenly golden and still pliable. If it cools completely before cutting, it may crack.
- Trim immediately. Use a round cutter or sharp knife while the wafer is warm. Work carefully because the steam escaping from hot dough can burn fingers.
- Fill after cooling briefly. Spread a thin layer of warm syrup filling over one wafer half, then place the second half on top. Too much filling makes the cookie slide and can force caramel into the appliance during later batches.
Ownership costs and common mistakes
Suppose a compact maker produces 30 usable wafers per hour and you bake once a month. Over two years, that is approximately 720 wafers. A $50–$100 appliance therefore costs about 7–14 cents per wafer before ingredients. At weekly use, the same appliance may produce 2,880 wafers over two years, reducing the equipment cost to roughly 2–4 cents per wafer. The calculation favors a sturdier maker when you bake often, even if its purchase price is higher.
The most common mistake is treating a stroopwafel maker like a sandwich press: too much dough, too much filling, and excessive pressure. Other problems include opening the lid repeatedly, cleaning while the coating is scorching hot, and stacking warm wafers before they have released their steam. Let finished wafers cool in a single layer so they remain crisp rather than soft.
Final recommendation
For most households, choose a compact dedicated electric stroopwafel maker with shallow 4–5-inch plates, adjustable heat, a rigid hinge, and easy-to-wipe surfaces. The CucinaPro Electric Stroopwafel Maker is a sensible example of this format. Choose a commercial-style iron only if you regularly make large batches; choose a stovetop iron if low cost and occasional use matter more than repeatable temperature control. The plate pattern and heat behavior are ultimately more important than extra indicator lights or a larger exterior body.

Write Your Review
No reviews yet. Be the first to share your experience!