

Key takeaways
- Adjustable rack height: At least three positions, with roughly 1–2 inches between usable levels.
- Independent element control: Helpful when one side of a dish needs more browning than another.
- Timer or automatic shutoff: Valuable because cheese and breadcrumbs can scorch within seconds.
- Visible indicator lights: These show when the elements are energized, although they do not prove that the food has reached a particular temperature.
- Cool-touch or insulated handles: Important when the rack must be moved during cooking.
The best salamander broiler for home kitchen cooking is usually a compact electric countertop model with a 1,500–2,400-watt heating element, at least 3 inches of cooking-height adjustment, and enough clearance for the manufacturer’s ventilation requirements.
A salamander is a high-heat overhead broiler: food sits beneath radiant elements rather than directly on a burner. It is useful for browning cheese, finishing gratins, melting toppings, blistering vegetables, and giving steaks or chops a fast surface sear. For most homes, the main challenge is not raw heat—it is finding a unit that fits safely, controls heat predictably, and can be cleaned without dismantling half the appliance.
Our top picks


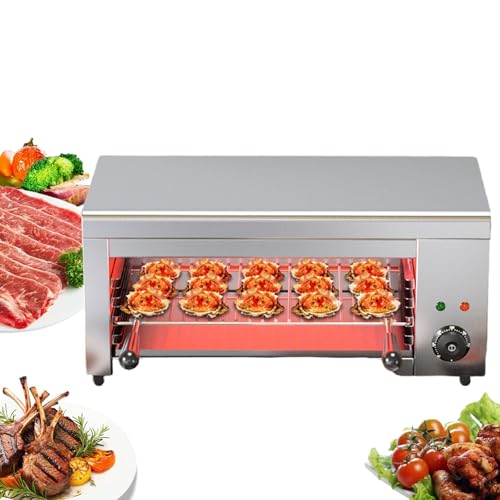
As an Amazon Associate we earn from qualifying purchases at no extra cost to you. Ratings are shown as listed on Amazon.
Best salamander broiler choices by home-kitchen situation
| Kitchen situation | Best type | Useful target specifications | Why it fits |
|---|---|---|---|
| Limited counter space or occasional use | Compact electric countertop salamander | 18–24 in. wide, 1,500–1,800 W, removable crumb tray | Usually fits a domestic circuit and is easier to store or clean |
| Frequent cooking for a family | Larger electric countertop salamander | 24–36 in. wide, 2,000–3,000 W, two-zone controls | Provides more surface area and lets you finish several portions at once |
| High-volume cooking or outdoor-style ventilation | Commercial gas salamander | 24–36 in. wide, adjustable rack, dedicated gas and exhaust installation | Fast recovery and powerful radiant heat, but installation is substantially more involved |
| Apartment, rental, or poorly ventilated kitchen | Small electric broiler or oven broiler | Lower-profile appliance with manufacturer-approved clearances | A full salamander may produce too much heat, smoke, and grease for the space |
Countertop dimensions and cooking clearance
Measure the appliance footprint, not just the advertised width. A unit listed as 24 inches wide may need another 2–4 inches at the sides for controls, cord routing, or airflow. Depth commonly falls between 18 and 24 inches, while height ranges from approximately 14 to 24 inches.
More important is the vertical space above the food. A salamander should have enough clearance to accommodate the tallest pan, rack adjustment, and the manufacturer’s minimum distance from combustible materials. A practical home setup often needs 30–36 inches of open vertical space above the cooking surface, although the installation manual takes priority.
Keep the appliance on a level, heat-resistant surface. Do not place it beneath low cabinets unless the manufacturer specifically permits that installation. Overhead heat can damage cabinet finishes, deform plastic trim, and heat a range hood beyond its intended operating conditions.
Heat output: watts are only part of the answer
Electric models are commonly rated from about 1,500 to 3,000 watts. At 120 volts, a 1,800-watt unit draws about 15 amps, which may leave little capacity on a typical 15-amp household circuit. A 2,400-watt model draws about 20 amps and generally requires a dedicated 20-amp circuit or a different electrical configuration.
Gas salamanders can deliver very intense radiant heat and recover quickly after the door or rack is opened. They also require a compatible gas connection, combustion air, and suitable exhaust. That makes them a poor choice for most casual home installations unless a qualified installer has approved the location.
Look for independently controlled upper and lower elements, or at least multiple power levels. A simple high/low switch can work well for melting and browning, but it offers less control than separate zones. Infrared elements brown quickly; metal-sheathed electric elements may heat more gradually but can be easier to regulate.
Temperature control and cooking clearance
A thermostat is useful, but many salamanders behave more like broilers than ovens. The temperature shown on a dial may describe the cavity air, while the food is primarily heated by direct radiation from above. Rack height, pan color, food thickness, and preheating time often affect results more than the dial setting.
Prioritize these controls:
- Adjustable rack height: At least three positions, with roughly 1–2 inches between usable levels.
- Independent element control: Helpful when one side of a dish needs more browning than another.
- Timer or automatic shutoff: Valuable because cheese and breadcrumbs can scorch within seconds.
- Visible indicator lights: These show when the elements are energized, although they do not prove that the food has reached a particular temperature.
- Cool-touch or insulated handles: Important when the rack must be moved during cooking.
A useful starting clearance is 3–5 inches between the food and the heating element for melting and gratinating, and 1–3 inches for rapid browning. Start farther away when using sugary sauces, cheese, or breadcrumbs, then move the rack closer in short intervals.
Ventilation requirements in a home
Broiling creates grease vapor, smoke, and a large amount of localized heat. A recirculating microwave hood is often inadequate for an uncovered salamander, especially when cooking fatty meat. A ducted range hood that vents outdoors is preferable, with the hood extending over the appliance rather than ending behind it.
Do not assume that a powerful bathroom fan or open window is an acceptable substitute. Check local building and fire rules, particularly for gas equipment. A commercial gas salamander may require a professional hood, fire-suppression provisions, gas-line work, and approval from the local authority.
For electric countertop use, place the salamander under the strongest suitable hood, leave the specified side and rear gaps, and keep paper towels, wooden utensils, curtains, and plastic containers away from the radiant heat path.
Cleaning and ownership realities
The parts that usually become troublesome first are the rack supports, crumb tray, heating-element guards, door hinges, and grease channels. A unit with a removable stainless-steel crumb tray is considerably easier to own than one that requires wiping debris around fixed rails.
After every use:
- Switch off the elements and allow the appliance to cool until it is safe to handle.
- Remove the rack and crumb tray; soak them in warm detergent solution rather than scraping aggressively.
- Wipe grease from the interior with a damp cloth and mild degreaser approved for stainless steel.
- Clean spills before the next high-heat cycle, since old grease can smoke or ignite.
- Keep liquid away from switches, thermostats, heating elements, and electrical openings.
Never spray cleaner directly onto hot elements. Avoid caustic oven cleaner unless the manual expressly permits it; it can damage aluminum, protective coatings, seals, and printed markings. Abrasive pads may also leave scratches that collect grease.
A simple fit and running-cost calculation
Suppose a 1,800-watt salamander runs for 12 minutes. Its energy use is:
1.8 kW × 0.2 hours = 0.36 kWh
At an electricity rate of $0.20–$0.40 per kWh, that cycle costs approximately $0.07–$0.14 in electricity. Preheating for an additional five minutes raises the total to about 0.51 kWh, or roughly $0.10–$0.20. The larger ownership costs are often ventilation, electrical upgrades, replacement racks, and cleaning time—not the electricity used for a single gratin.
What to buy, and what to avoid
Choose a compact electric model when you want occasional high-heat finishing and can provide a safe counter location beneath effective extraction. Choose a larger two-zone electric model when you regularly cook several portions and have a dedicated circuit. Choose gas only when the installation has been designed and approved for commercial-style equipment.
Avoid units with no published clearance requirements, permanently attached crumb trays, vague electrical ratings, unstable racks, or controls positioned directly above the hottest exhaust. Also be cautious with very shallow models: they may advertise high wattage but provide little vertical adjustment, making it difficult to brown food evenly without burning the topping.
Bottom line
For the typical home kitchen, the best salamander broiler for home kitchen use is a well-insulated electric countertop unit sized around 18–24 inches wide, rated near 1,500–2,000 watts, fitted with an adjustable rack and removable stainless-steel drip or crumb tray. Before buying, confirm the circuit requirement, hood arrangement, vertical clearance, and replacement-part availability. Those practical details determine whether the broiler becomes a useful finishing tool or an expensive appliance that is too hot, smoky, and difficult to clean for everyday home cooking.

Write Your Review
No reviews yet. Be the first to share your experience!